Whether you are upgrading to one of the latest single din stereos or replacing a faulty one, we have a complete guide to installing it yourself in minutes.
The only tool that you require are removal keys, which slide down the side of the stereo. It’s advised that you avoid any other tools as you may cause damage to the dash or stereo itself.
10 steps to installing a new single din car stereo include:
- Remove the negative cable from the battery.
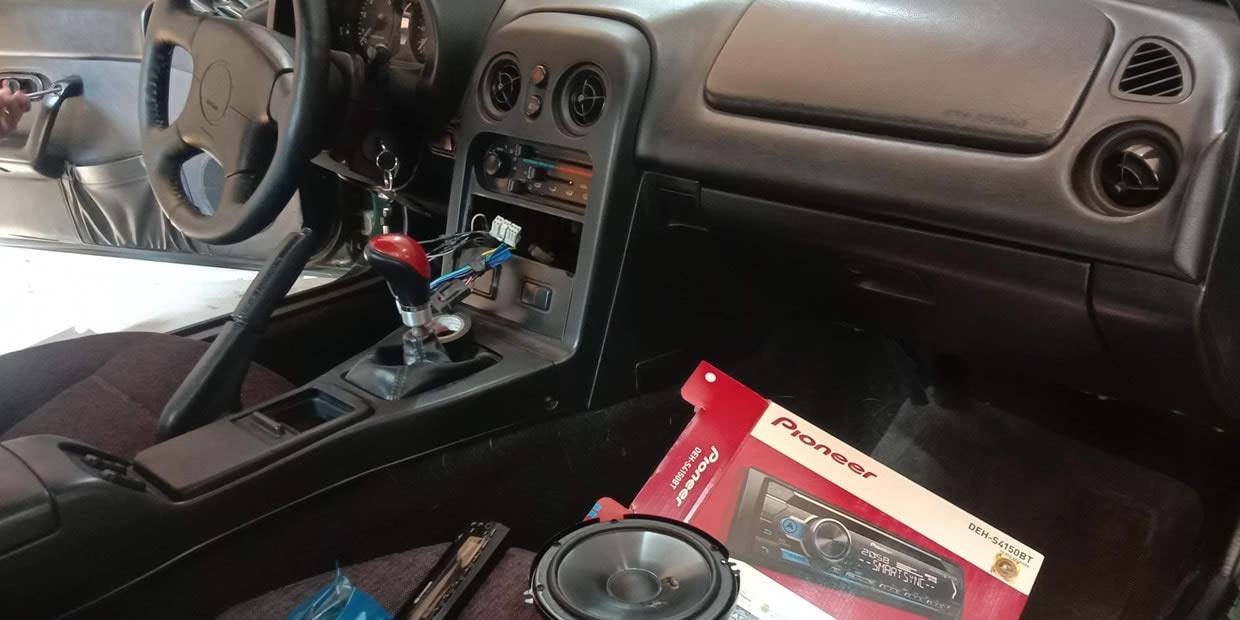
- Remove any bits of trim surrounding the stereo.
- Insert the removal keys into the slot on the side of the stereo.
- Slowly pull the stereo towards you (you shouldn’t need to apply force).
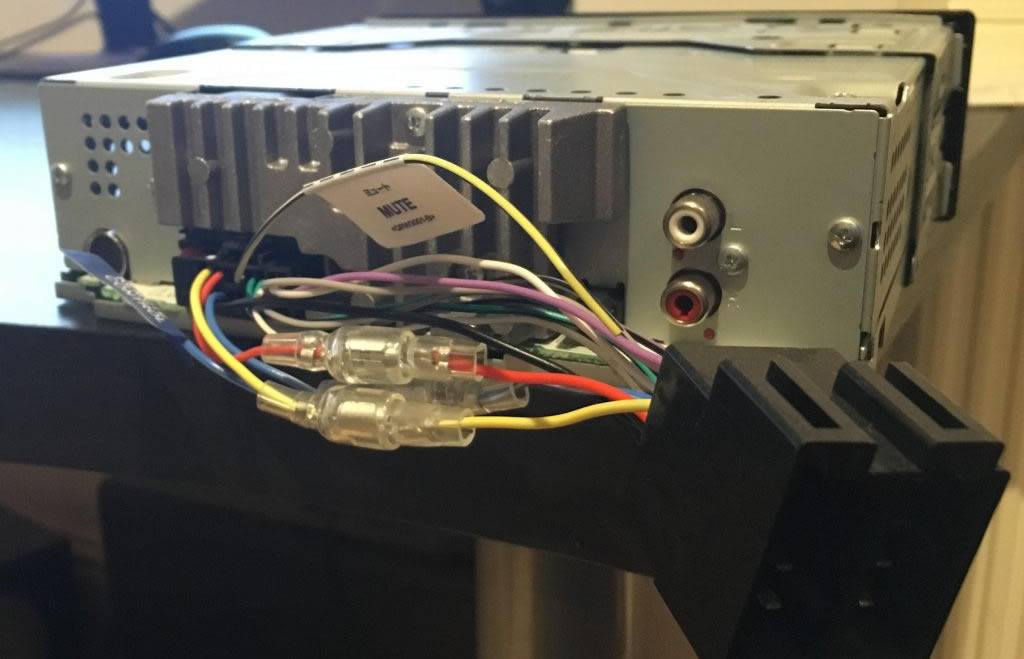
- Unplug the factory wiring harness and antenna at the back of the stereo.
- Get the new stereo and plug in any new wiring.
- Place the car stereo into the opening.
- Connect the negative cable to the battery
- Test it is fully functioning and all the speakers work
- Install any trim surrounding the unit.
It’s important to note that not all head unit will use removal keys. Some may be bolted in place or may require a new dash kit for the installation. It’s also worth mentioning that if you have any additional car speakers installed, you may have more wiring to plug into the stereo.
Antenna Adapter for ISO to DIN
Many aftermarket stereos may require a DIN antenna aerial connector as opposed to the ISO connector. Without this adapter, you won’t be able to use your new single din stereo but you may still be able to use the other inputs. The ISO to DIN radio adapter (as shown below) is relatively cheap and often forgotten when installing a new aftermarket stereo.
Double Din to Single Din Conversion
The disadvantage of a double din head unit is that it takes up a lot of space within the dash. If you were to retrofit a single din in the space of a double din, you will have a couple of inches of space free. This can be used as a storage box, area to install a boost gauge and much more.
Switching to a single din stereo is relatively simple and involves removing the double din and replacing it with a new faceplate. This allow you to insert the single din into its cage at either the bottom or top half of the faceplate. You can then do whatever you wish in the other unused section of the cage.
Choosing between a double din and a single din head unit is purely down to personal preference. However, it’s worth noting that it’s much harder to switch from a single din to double din in the majority of cases and moving to the smaller stereo is much easier.
