Refurbishing your wheels can be fairly expensive if you request a professional to do the job. You can pay anywhere from $100 to $200 per wheel and if you have a diamond cut alloy, it will require a professional machine to cut the alloy.
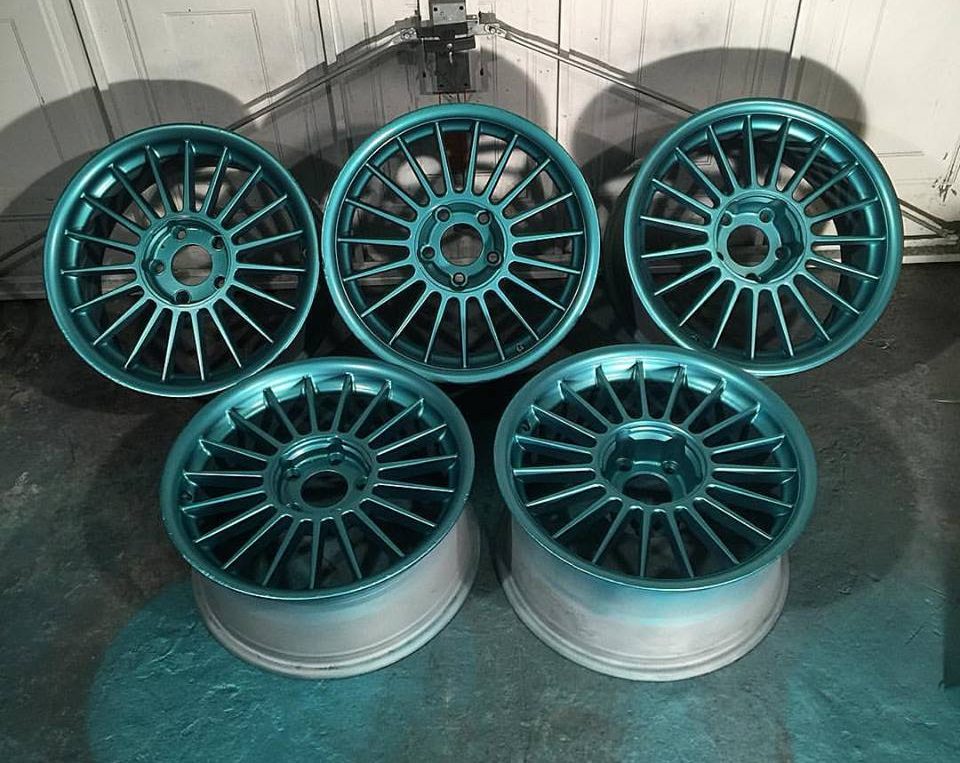
The easiest method to refurb your wheels yourself is to powder coat them with a color of your choice. This way, there will be no diamond cutting machine required or polishing, which makes the refurbishment fairly easy and cost effective.
The refurbishment of alloys is usually a job you would associate with a professional body-shop. However, if have clear instructions of what products you need and the method to get it done properly, it really can be completed by anyone.
Diamond cut or polished wheels will require a specialist diamond cut machine or somebody that is good with a polisher to complete the job correctly.
For this reason, you cannot really perform a DIY wheel refurbishment on this type of rim by the average person. However, if you are going for a rattle can DIY wheel refurb, you can achieve very good results following our detailed guide below.
Table of Contents
How To Paint Your Wheels Yourself
The biggest downfall of diamond cut or polished wheels is that it either takes a specialists machine or its very time consuming. However, if you were to refurbish your wheels yourself, you will save a large sum of money. Using paint or powder coating, you will also not need to worry about the dreaded milky/corrosion defect.
If you are looking at a DIY wheel refurbishment, below are the following steps you will need to take:
What You Need To Refurb Alloy Wheels
- Wet and Dry Sandpaper
- Masking Tape or Playing Cards
- Filler – We recommend the Bondo 261 by 3M Filler
- Primer – We recommend the Duplicolor Primer Paint
- Paint Color of your choice – We recommend the Duplicolor Rattle Can Paint
- Lacquer to finish – We recommend the Duplicolor Lacquer
Clean Wheels Thoroughly
Brake dust that has built up overtime can be a real issue and need to be removed. You should ensure that the wheels are fully clean with no chunks of dirt and use a wheel cleaner for brake dust multiple times to achieve for a clean surface to paint on.
Any bits of dirty build up or dust can effect the finish on the paint and by a thorough clean, this can be prevented.
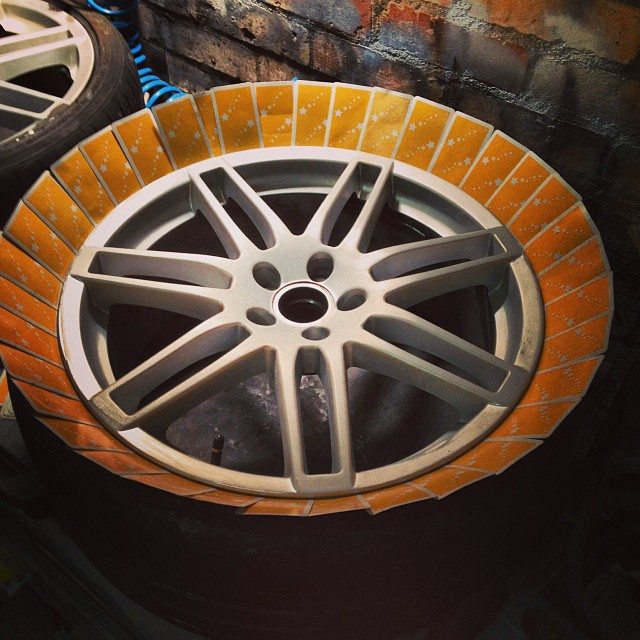
Mask Up Wheels If Rim Has Tires
To avoid your tires getting covered in paint, you must mask them up. There are two methods of doing this. Either the standard method of simply covering the tires in masking tape or your can be more creative and use playing cards as below. It might help if you deflate the tire so that you can mask every part of the tire.
Sand Down Wheels
To prepare the wheels, they must be sanded down correctly. You will want to begin sanding using a course grit and use it on the entire wheel. Of course, if the wheel paint is flaking or has bad corrosion, you will need to go down to the bare metal. Use a lesser course grit sandpaper until you are happy the finish is smooth and its ready for filler.
Use Filler To Fill In Defects
You will want to fill in curbing marks or any other defects and follow the instructions of your designated car body filler. The majority of fillers requires around 48 hours to dry. Once the filler has dried, you will want to sand it down with a low course grit sand paper until it’s smooth.
Prime The Wheels Ready For Paint
Ensure that the wheel is washed and dried thoroughly before applying any primer. Dust from sanding gets everywhere and must be removed otherwise the primer will become defective. The primer will need “awakening” and the best way to do this is to leave it in hot water for around 30 minutes.
Before spraying, shake the primer and ensure that you are not too close to the wheel. Begin to spray several thin coats, I usually spray around 5 or 6 coats per wheel. Allow the primer to spray between coats and sand with a very fine grit.

Paint The Wheels
Finally onto painting the wheels with your choice of either powder coating or rattle cans. The latter being the cheapest and easiest option that can achieve the same results if the preparation is perfect.
Before spraying any paint, you will want ensure the primer has had adequate time to dry (place in front of heater/radiator if not) and it has been sanded. As with the primer, “wake” the paint up with warm water and give it a good shake.
When painting your wheels, ensure that you apply several thin coats and allow each layer to dry. To avoid any “runs” or lumps in the paint, aim away from the wheel then sweep across. Its simple and effective to getting the best finish.

Apply Lacquer or Clear Coat
Finally, allow the paint to dry for at least 48 hours (leave in front of a heater or radiator) and spray the lacquer onto the wheel. This will provide a hard protective layer over the fresh paint to protect it against the outside environment.
Once dried, we strongly recommend that you use the best wheel wax to ensure good health. This will prevent damage to the fresh paint and give the wheels additional shine.
What Is The Best Paint To Use For Wheels
The painting part of the rim refurbishment can only be perfected if the preparation is completed correctly. The preparation involves lots of rubbing down and filling imperfections in the rim.
Using powder coating paint instead of a rattle can is a preferred method but not everyone will have access to equipment. Using rattle cans can still get a great finish and easy to touch up if it gets chipped.
For this guide, we have been using a Duplicolor Rattle Can Paint, which is the best paint for wheel refurbishments and very affordable. There is a great range of colors available and it is always worth buying a few extra cans for a thicker and tougher coating.
However, with any wheels that you refurbish, the end result is all dependent upon your preparation. Rushing the early stages can result in a poor finish that become flaky as shown below.

Polished or Diamond Cut Wheels
A big misconception in terms of wheels is that diamond cut and polished wheels are the same. This statement is incorrect. Diamond cutting involves taking a layer of the wheel off using a machine to reveal a new shiny finish.
It is then lacquered to seal to finish, although once damaged, it will start to become milky in places from where water has entered. A diamond is used to cut into the wheel hence the term Diamond Cutting. Due to the layers that will be removed, diamond cutting can only take place on the same wheel 3 or 4 times.
A Polished wheel does not remove deep layers of the wheel but its more of a case of getting the surface as smooth and shiny as possible. If the wheels are a complex design or there is too much damage to the alloy, it may be too hard to polish the wheels. The only option would be to diamond cut the alloy, which uses a machine to cut the alloy.
