
A relatively new method of changing the color of your car is by using a substance called “Plasti Dip”. But What is Plasti Dip? In short, Plasti Dip is a removable spray paint that is air dry, specialty rubber coating that can be used in a range of applications. The most common use of Plasti Dip is a quick and cheap way to change the color of your car but it can also be used in the home environment.
To Plasti Dip your own car, you can simply by a complete DIY kit and apply the product via dipping, brushing or spraying. Plasti Dip is a great alternative to spraying or wrapping your car as it is very easy to apply and can be removed easily in case of poor application or you wish to change the color again.
Table of Contents
How long does Plasti Dip last on a car?
If the car has been prepped and the Plasti Dip was applied properly, you can expect between 2 to 3 years without needing to perform touch ups. Factors such as the number of coats (thickness) and the distance when spraying will give a strong indication of the longevity of the Plasti Dip.
Plasti Dip is fairly durable and will remain flexible over time. It can withstand temperatures from -30 to 200 Fahrenheit where it will not crack or become brittle.
Best Kit to Plasti Dip Your Car Professionally
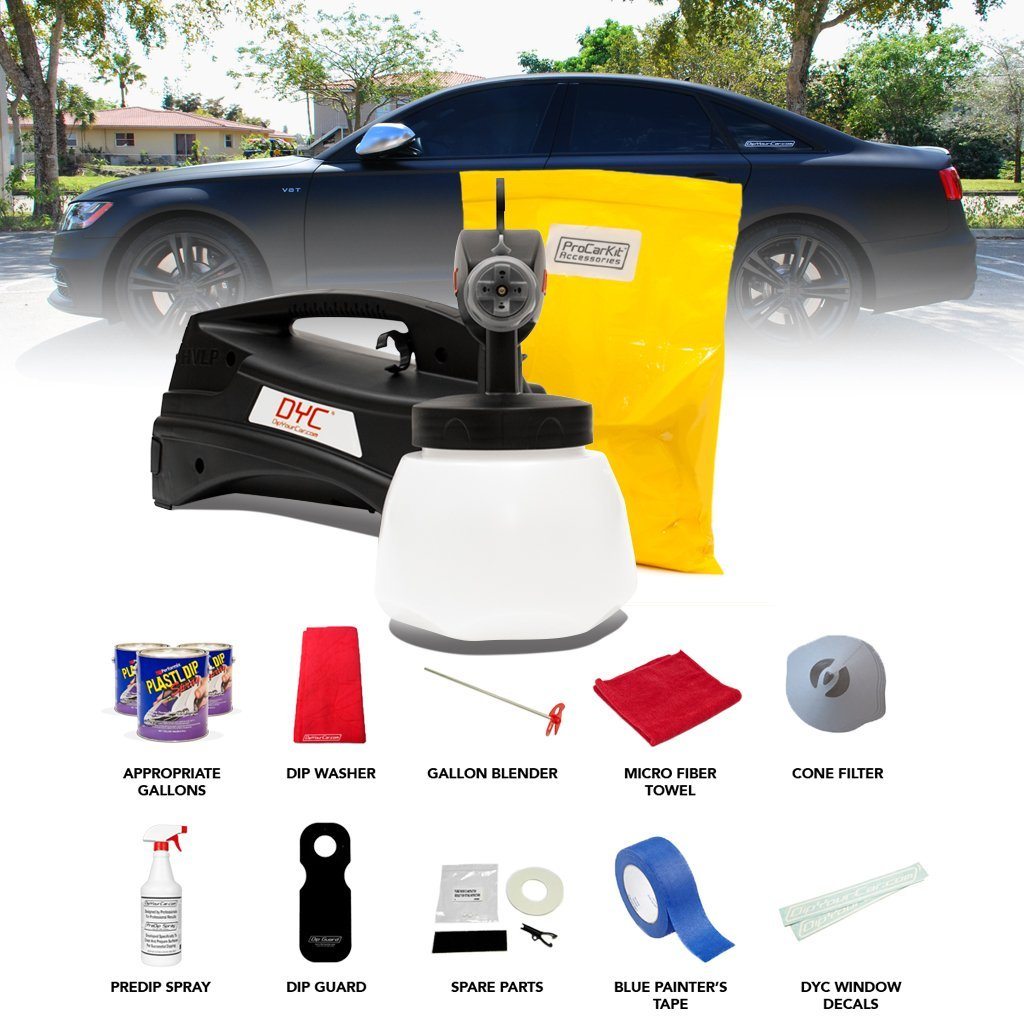
If you want a good finish, you will want to avoid the usual rattle cans and use a professional DYC Plasti Dip Kit. This kit comes with sprayer that attaches with a long plastic hose to a turbine that makes around 3 PSI. It is electric powered and pushes the air into the sprayer that applies the Plasti Dip evenly. You can hold 48oz in the spray cup before you need to refill it.
What Are The Best Color Plasti Dips?
The Dip Your Car kit does not come with additional colors (unless you are sticking with the base coat) and you can choose whatever you wish. In my opinion, you can be a bit mad when choosing a plasti dip color because it is completely removable.
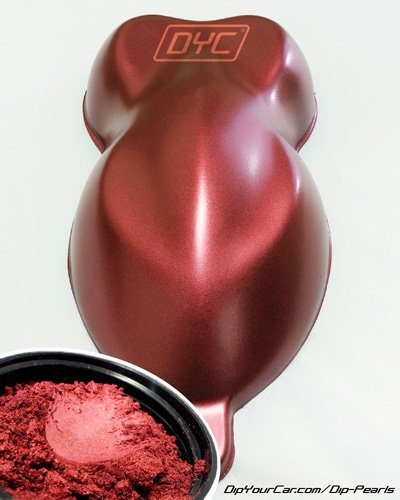
With that being said, my favorite plasti dip color is the “Radiant Red Solid Pearl” as its a shade of red that is simply not seen on the road. However, DYC offer a wide ranging choice of colors that will satisfy your needs.
You will need to ensure that you have the Top Coat Clear Plasti Dip so that you can mix the color into the it. Each gallon of top coat requires 50 grams of mix.
How to Apply Plasti Dip to Your Car
The finish you achieve for your hard work and money will be down to the application of the plasti dip. Unless you have gone for the rattle can approach where you are not that bothered, you will want to ensure the application is correct.
The application itself is not that stressful and is made much simpler through the use of the DYC kit. Just ensure that you take your time and if you want it to last, you will need to apply more coats.
Car Plasti Dip Preparation
Before you apply any Plasti Dip to your car, you must prepare your car. This will means that you will need to apply the blue tape to trims and mask up windows and other parts of the car. Next, you will need to apply the predip spray that is alcohol based that removes imperfections and solvents that the plasti dip will not adhere too.
Apply Plasti Dip Base Coat
The kit includes 4 gallons of matte black plasti dip that will act as your base coat. Before you put it into the electric spray can, be sure to use the gallon blender to mix up the plasti dip from within the can. When you are spraying the car, you want to ensure that you are spraying vertical with even stripes and a 50% overlap.
Ensure that your first coat is the lightest coat and aim for around 4 coats of plasti dip on your car for a durable finish.
How long do you have to wait between coats of Plasti Dip?
Between coats of plasti dip, you should wait at least 15 to 30 minutes. The current temperature will play a part in the waiting time because the colder it is, the wetter the plasti dip will be. If you wanted to speed things up, you can use a hair dryer on low heat and a low fan setting to provide moderate heat to the dip.
Apply Plasti Dip Top Coat and Color
Firstly you will need to mix the color with the top coat. As mentioned, you will need 50 grams per 1 gallon of top coat that you use. When pouring the mixture packet into the top coat can, try and spread it out and not just pour it all in the middle. Use a clean stick to break down the built up mixture clumps so that they break down within the can. Using the gallon blender, thoroughly mix in the mixture to the top coat.
Once you have poured your plasti dip mixture into the spray can, you are finally ready to spray it onto the car. The main thing to remember when spraying the top coat is that you need heavy and wet coats whilst avoiding runs in the dip. Try and apply 2 or 3 coats of the top coat and let it fully dry out before removing your masking tape.
How to Wash Plasti Dip Cars
Plasti Dipped cars will require a little extra to get dirt, salt and road grime removed. We have discussed the proper technique to wash cars in great detail, which is similar but we strongly recommend using Simple Green as an additive to water. It is an all purpose cleaner that is perfect for plasti dipped cars with tough dirt.
Avoid strong degreasers such as “GooGone” as this may have the effect of stripping the plasti dip altogether. The Simple Green formula is excellent and you will be amazed with the amount of dirt that will be removed.
